We all go though the process of creating differently. I thought I would show you how I do it. I don't have the time, nor the energy to make a quilt A-Z in one go. So if you want to peak over my shoulder, you will have to come back into my sewing-room again. I will be posting in this post as I go along, hopefully every day.
1 Juli: I made a big mistake when I started this. I told my brother I were going to do this and without asking for measurements I just went ahead and made a drawing.
The pattern is by Darlene Zimmerman. The colours he gave me were: blue, red, yellow and white.

He liked it, even if the blue colour went lilac and the mistake I made... Now I got the measurements, it had to be 100 X 50 centimetres. (39.37 X 19.69 inches) As you may have noticed the pattern is a square, but I could fix that! Hopefully..
Then I suddenly realised that the triangles were going to be so small I just knew it would be a mess! Heaven; WHY do I get in to these things??
But my sweet brother told me I could get more space on the wall! Back to the paper and pen. The layout were the next thing and get the colours right. So that became this:

I still have to figure out if I will use white anywhere. I also have to look though my fabrics, but that will be in the daylight. My eyes are not what they used to be. But what is where it used to be in my body?. Things have moved south that used to stay at north... I can't understand why Newton needed the apple. All he had to do in order to see the effect of gravity, was to look at the difference in a young and old woman! hehehe
Second part.
Today I felt like the little girl that went to visit the 3 bears. I had to work out the measurements, and that turned out to be one too small, one too big and the last just right! hee hee
Darlene Zimmerman that made the pattern uses inches. I can use both inches and centimetres. But why make it easy and just use inches? No, not me I can fix this in order to match the measurement my brother gave me! Famous last words... But here is the final pattern with measurements. I off course keep this together with the other drawings of the pattern. That way I have it if I want to use it again.

I always try a new block just to see how it looks and check if my measure is ok. Those blocks are not made in the fabric I want to use. Just because printed fabric is expensive and if I mess it up it doesn't matter. That block I can use with other test-blocks for a pillow, tablecloth or a sample-quilt. I could just sew one row to check the size, but where can I use one row? I need a star-block and a centre-block for this quilt. I made the centre block first and it was ok. The first star-block was a little runt compared to the other. The next I turned one point wrong, but it was too big so I didn't even rip it. Too late to swim in the rip-it rip-it pond! But the last one turned out to be ok. The reason why I just couldn't figure it out is because the centre-block has the squares "on point". That makes a difference in the size of the two squares used in the two blocks. Here are the test-blocks.

Now I mess up my table big time! Out comes the baskets with fabrics:

I know I could keep it more organized, but it is my creative mess! hee hee hee
My brother wanted white, blue, red and yellow. It came to a bit of a compromise, the blue has tiny white flowers. This is what came out of messing around:

Next step is to cut the fabrics and sew the blocks, just a bit boring to watch, so I will wait until I am sewing the 3 layers of the quilt together. I am sure my way is not the way most people do it. I only had a picture of a finished quilt when I made my first quilt. Had no idea how it was done, so I just did it. Later it turned out it is nothing like the way it is supposed to be done! But that is me, always going my own way, tripping over tings on the path, but I get there in the end!
Happy 4Th of July USA!!
Almost there!
As you may have read I didn't have any directions on how to quilt. One picture with an finished Amish quilt forced me to come up with solutions. I have since learnt that some things I do very differently. This is a chance to show you all, you never know you may get a good laugh! So hold on to your sits, here we go.
When ever I am going to decide on what border to use, I will lay everything out on the bed and go and do something else! I will then come back several times, just to see if the colour I want is ok.
The first one was one of those YIKES!

The next one were much better

I added the same yellow as one more border. I like to have a big mitered corner so that is what I normally do.
I don't put my quilts together like most people do. I didn't know how, so I just did what I thought was good. I sew everything together in one go. I put the batter down first, then the back-fabric and then the top facing down. Pin everything and sew all around leaving a gap to turn everything.

After I turned everything I use the iron on the edges, trying to fold everything in where the gap is.

All that is left now is to figure out if I am going to do a very simple stitching om the machine, or find some patterns and sew them by hand.
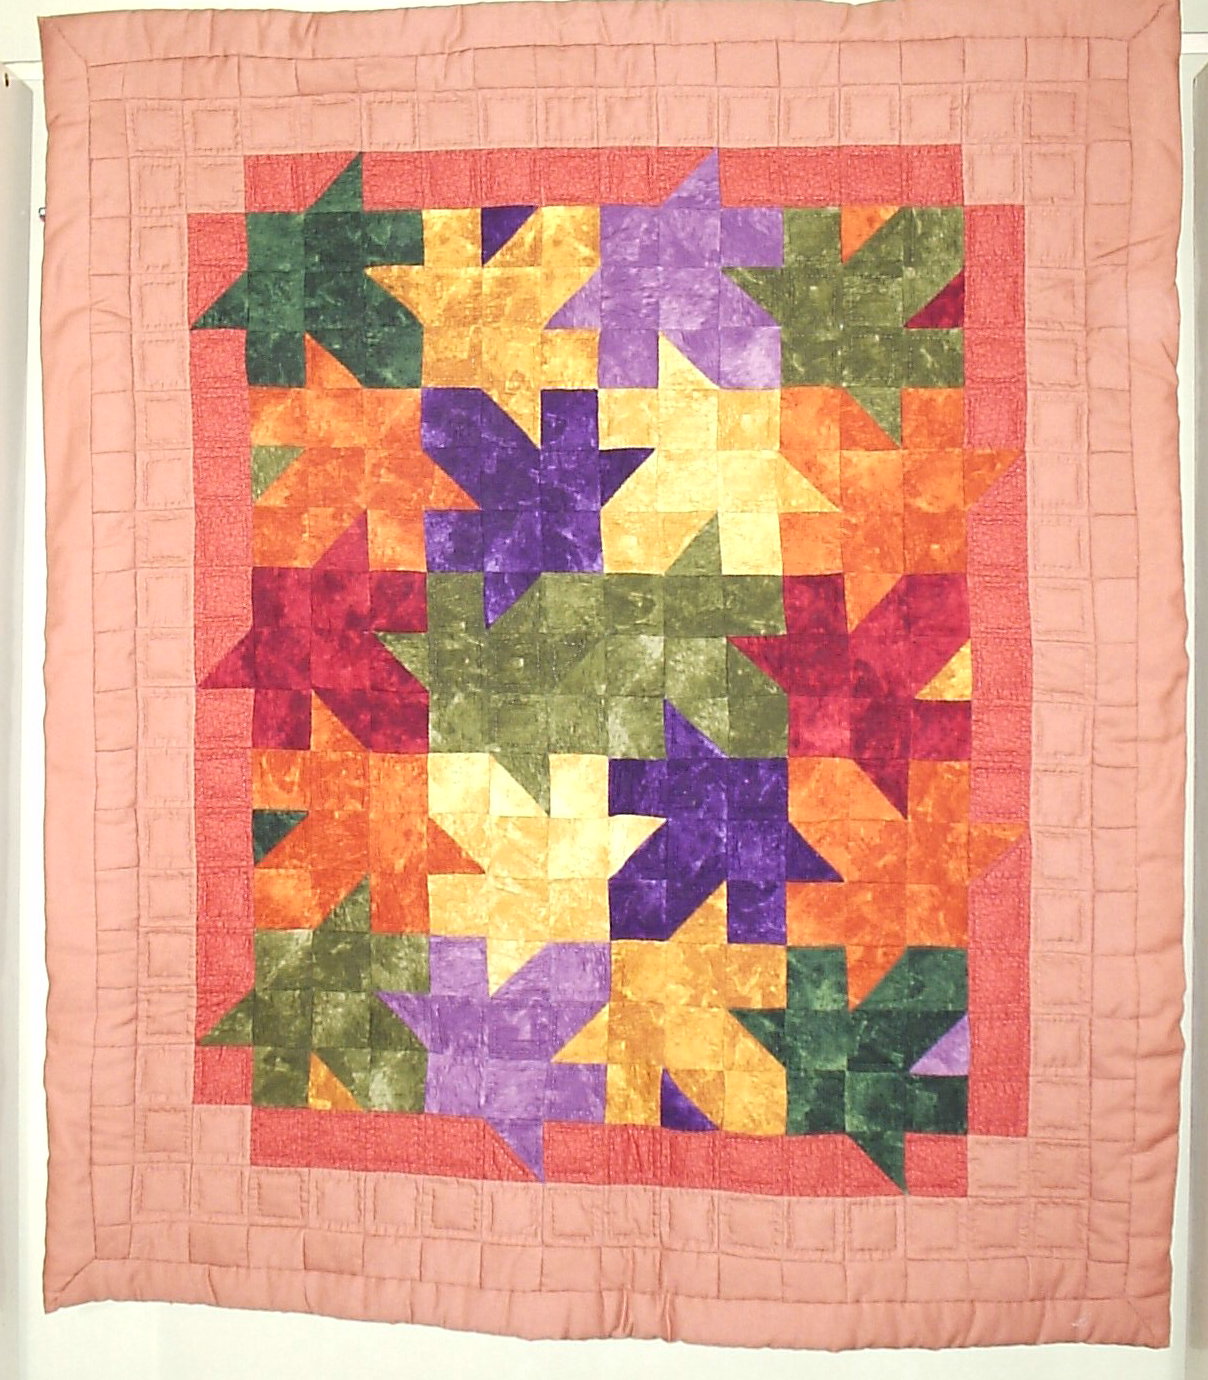
Finally done! It has been so hot it was difficult to do anything. But today it was a bit cooler so my needle could turn on the turbo. I decided to do the stitching by hand. I am not good toin quilting free hand so I use stencils. I cut them out in soft plastic and pin them to the quilt. I don't really trust any of the marking pens and this way I just move it around. I sewed four small hearts in the centre of each star. Then I sewed straight lines around everything else. One of these days I will pull myself together and practise "proper" quilting on my machine.

Since I put my quilts together the way I do, I like to have mitered corners. I mark them by sewing a line on each side.

Here is what the centre looks like finished

So, that was my work process for a quilt. I know I do it differently than many others, but I am still learning.
I hope you liked the peak and you didn't fall off your chairs laughing at my way!